
What a power tiller attachment package actually contains
A power tiller attachment package is the machine plus the set of implements and attachments that will actually be used in the fields it is bought for — plus the mounting hardware, the wear parts and the packing unit that travel with them. It is assembled in the opposite order from the way a catalogue presents it: a catalogue starts with the attachment list and lets the buyer pick, while a package starts with the work to be done and lets the attachment list fall out of it.
Three layers make up the thing a distributor or importer is actually ordering:
- The machine layer — the platform, its power class, its working width, and the drive and mounting end that every attachment has to meet.
- The attachment layer — the implement bodies that will earn their keep in that market, the wheel set that matches the ground, and the wear parts that get consumed (blades, tines, share points).
- The order layer — the variants, the hardware that has to be specified line by line, the documentation that has to arrive with the goods, and the unit the whole package is packed and shipped in.
Two-wheel tractor attachments are not a shelf of interchangeable accessories. On walk-behind machines, each machine carries its own implement system: the tooling is built around that machine's frame and drive, not around a category-wide fitting. The University of Minnesota Extension makes this point when it describes walk-behind tractors as a low-cost way to mechanise, with the caveat that implements belong to the machine system they were designed for (UMN Extension). That single fact is why a "package" is a planning exercise rather than a shopping list.
One disclosure before the details, because it decides how you read them: this article is published by SUNTEC, which manufactures the platforms used below as worked examples. Every check here is written to work against us as well — the same questions go to any supplier, and the answers belong in writing. The implement range grouped by the work it does is set out in the implements and attachments hub.

The attachment layer fitted to the machine layer: a rotary cultivator mounted on a two-wheel tractor, with the drive end and guard in place.
Start from the work, not from the attachment list
The first question is not "which attachments are available" but "what work has to happen, in what soil, in which month". A market that buys one machine for a single job needs one attachment set. A market that covers paddy and dry land in the same season needs a wider set, because the same machine is doing different jobs on different ground.
Work out the answer per field, not per catalogue section, then map it onto attachment families:
Work to be done | Attachment family | What it decides | What you have to know before ordering |
|---|---|---|---|
Breaking and preparing soil | Rotary cultivator / tiller in a given working width | Working width and depth, blade count, and how many passes the strip needs | Soil type, moisture at the working month, strip width per pass |
Turning soil over | Single- or double-furrow plough | Furrow count, depth, and the pull the machine has to deliver | Plot shape, obstacles, whether a hardpan is being broken |
Ridging and furrow making | Hiller / furrower | Ridge height and spacing | Row spacing the buyers in that market actually use |
Vegetation control between rows and on headlands | Mower attachment | Cutting width, and the material it has to take | Crop, residue volume, and whether the ground is uneven |
Traction on soft or flooded ground | Anti-skid / steel traction wheels | Grip and flotation, and the track width that follows | Flooded or dry working, and the row spacing on that ground |
Moving inputs and produce | Trailer connection | Load and route, and the speed the machine runs at | Distances, gates, and gradients on the route |
Two things usually go wrong at this stage. The first is buying the attachment the catalogue makes easiest to picture rather than the one the field mix calls for. The second is planning for the most demanding attachment first, so the whole quotation lands on a machine class the market does not need. This is the same order of thinking as matching the machine to field conditions — conditions first, hardware second.
The scale is worth keeping in view, because it is the reason this planning work pays for itself: two-wheel tractors are not a marginal category in the mechanisation patterns the FAO reviews.
"…over 80 percent of tillage operations are mechanized and 90 percent are performed by the 300 000 plus 2WTs…"— FAO, Mechanization for Rural Development, chapter 4, on Bangladesh
That class is not widely visible in standard tractor statistics, and a package decided well in a market like that is not a niche purchase.
Fix the platform before you fix the attachment list
The platform is the constraint that everything else inherits: power class, weight, working width, and the physical end of the machine where attachments attach. Deciding it after the attachment list means re-planning the list.
SUNTEC's current range is built on two platforms that sit at different weights, which makes them a useful contrast: the lighter M80 power tiller platform, documented at 179 kg without the engine and 7–10 hp compatible, and the heavier GN12 walking tractor. These are chassis figures; they become usable in an order only once the interface line is confirmed separately.
Platform figure | Lighter platform (M80) | Heavier platform (GN12) |
|---|---|---|
Power class | 7–10 hp compatible | 12.5 hp class |
Mass without engine | 179 kg | 470 kg |
Working width | 480 mm standard, 600 mm optional | 480 mm or 600 mm |
Blade count | 14 standard, up to 16 | In the customer specification sheet on file, a 600 mm configuration with 18 or 24 blades |
Overall width | 710 mm | 980 mm |
Wheel tread settings | 390–780 mm | 570–810 mm, five settings |
Machine length | 2050 mm | 2950 mm |
Machine height | 1235 mm | 1240 mm |
On working width, read the two figures side by side. Both 480 mm and 600 mm arrangements exist across the range, and they are not the same machine in a quote: the blade count and the coverage differ, and the narrower arrangement is not a substitute for the wider one. Note also that the specification sheet on file for this range records a 600 mm configuration — so when a supplier's sheet and a buyer's template disagree on width, it is worth reconciling which arrangement the sheet is describing before the order is written.
Platform choice follows the field mix, not the other way round: the lighter class suits smaller, tighter plots and lighter cultivation; the heavier class suits harder, wider or repeated work and short-distance transport. Both decisions still have to survive the same reality test — the narrowest point on the route into the field, and the turning space at the row end.
The four interface questions that decide what can be fitted
Once the platform is fixed, four questions decide whether an attachment actually works when it lands. They are worth asking in writing, because none of them is answered by an attachment name.
1. What is the mounting and drive interface? On these machines the drive comes off the machine side. On the M80 platform the documented path runs engine to main shaft through two V-belts, main shaft to wheel axle through gears, and transmission to blade axle through a chain; on the GN12 the drive passes to an iron gearbox at the rotary connection. That is the general principle for this class of machine: ground-engaging implements of this kind are driven from the two-wheel tractor's own engine pulley and carried on its rear mounting bracket (TNAU Agritech portal). A driven attachment therefore has to match the machine's transmission and its brackets, and the mounting hardware has to be named on one side of the order.

The machine side of the interface: the drive and mounting end of a walking tractor, where the attachment's input is decided.
2. Does the working width and depth fit the crop layout? A rotation of 480 mm and 600 mm arrangements is a width decision against strips, beds, bunds and row spacing — not against the engine alone. If buyers in that market plant on a fixed spacing, that spacing is a hard constraint on which arrangement is usable, and on how many passes each strip takes.
3. What does the wheel set do to track width and traction? The wheel set is where traction and row spacing meet: anti-skid or steel traction wheels for soft and flooded ground, and tread settings that decide whether the machine works between rows or over them. Both platforms document a tread range rather than a single setting — the useful thing to ask for.
4. Is there enough power and speed for the attachment at that width? The wider arrangement asks more of the machine: more blade positions in the soil, more torque, more time per strip at a fixed forward speed. This is where a specification sheet is read as a system rather than as a list — the discipline behind reading a specification sheet properly, and where a package gets over-specified or under-specified.
There is a standards asymmetry worth knowing about. On four-wheel tractors, the three-point hitch is standardised by dimension categories — ISO 730 sets them out (ISO 730:2009, preview) — which is why cross-brand fitment tables exist for that class at all. No equivalent international standard interface is in general use for walk-behind machines, so the confirmation happens per machine and per attachment, and it happens in writing.
Sizing the set: how many machines, how many attachments
Quantity is a separate decision from selection, and it is where a package gets bloated or thin.
Three inputs drive it. The number of distinct work streams decides how many attachment bodies are needed at all: one machine covering one job carries one set, a machine covering tillage, ridging and transport carries three. The season sequence decides whether those sets overlap in time — where paddy and dry-land preparation follow each other on the same plots, the traction set and the tillage set are used in different months, on the same machine. The wear rate decides what has to be ordered as consumables rather than equipment: blades and tines are replaced on area worked, not on machine count.
Keep the order split into three lines to the quotation: equipment (machine plus implement bodies), wear parts (blades, tines, share points), and hardware that could otherwise be assumed (mounting brackets, belts and chains, wheel sets, guards where they are configured). Attachments quoted as accessories and attachments quoted as equipment behave very differently in a quotation, and for a distributor the difference lands in the spare-parts plan — which is what the parts and service side of the same range covers.
What the order has to state, and what it should not assume
The order is where a package either survives contact with production or turns into a negotiation after the goods are made. Six lines carry most of that risk:
Order line | What has to be written | Why it matters |
|---|---|---|
Implement variant | Working width and blade arrangement (for example 480 mm or 600 mm, with blade count) | The same implement family is two different products at two widths |
Mounting and drive hardware | Brackets, link points, belts, chains, gearbox connection for the driven implements | The hardware lives on the machine side and is not assumed to follow the attachment |
Wheel set and tread | Which wheels, and which tread setting for the row layout | Traction and row spacing are set here, not in the field |
Wear parts | Which items are consumables, and for which worked area | It is the difference between a machine sale and a supply relationship |
Documentation | Manual, labelling and part identification that ships with the goods | A distributor supports the package locally and needs to identify parts |
Packing unit | How implement and machine are packed, and what the shipping unit contains | It decides container planning and the unloading labour at the other end |

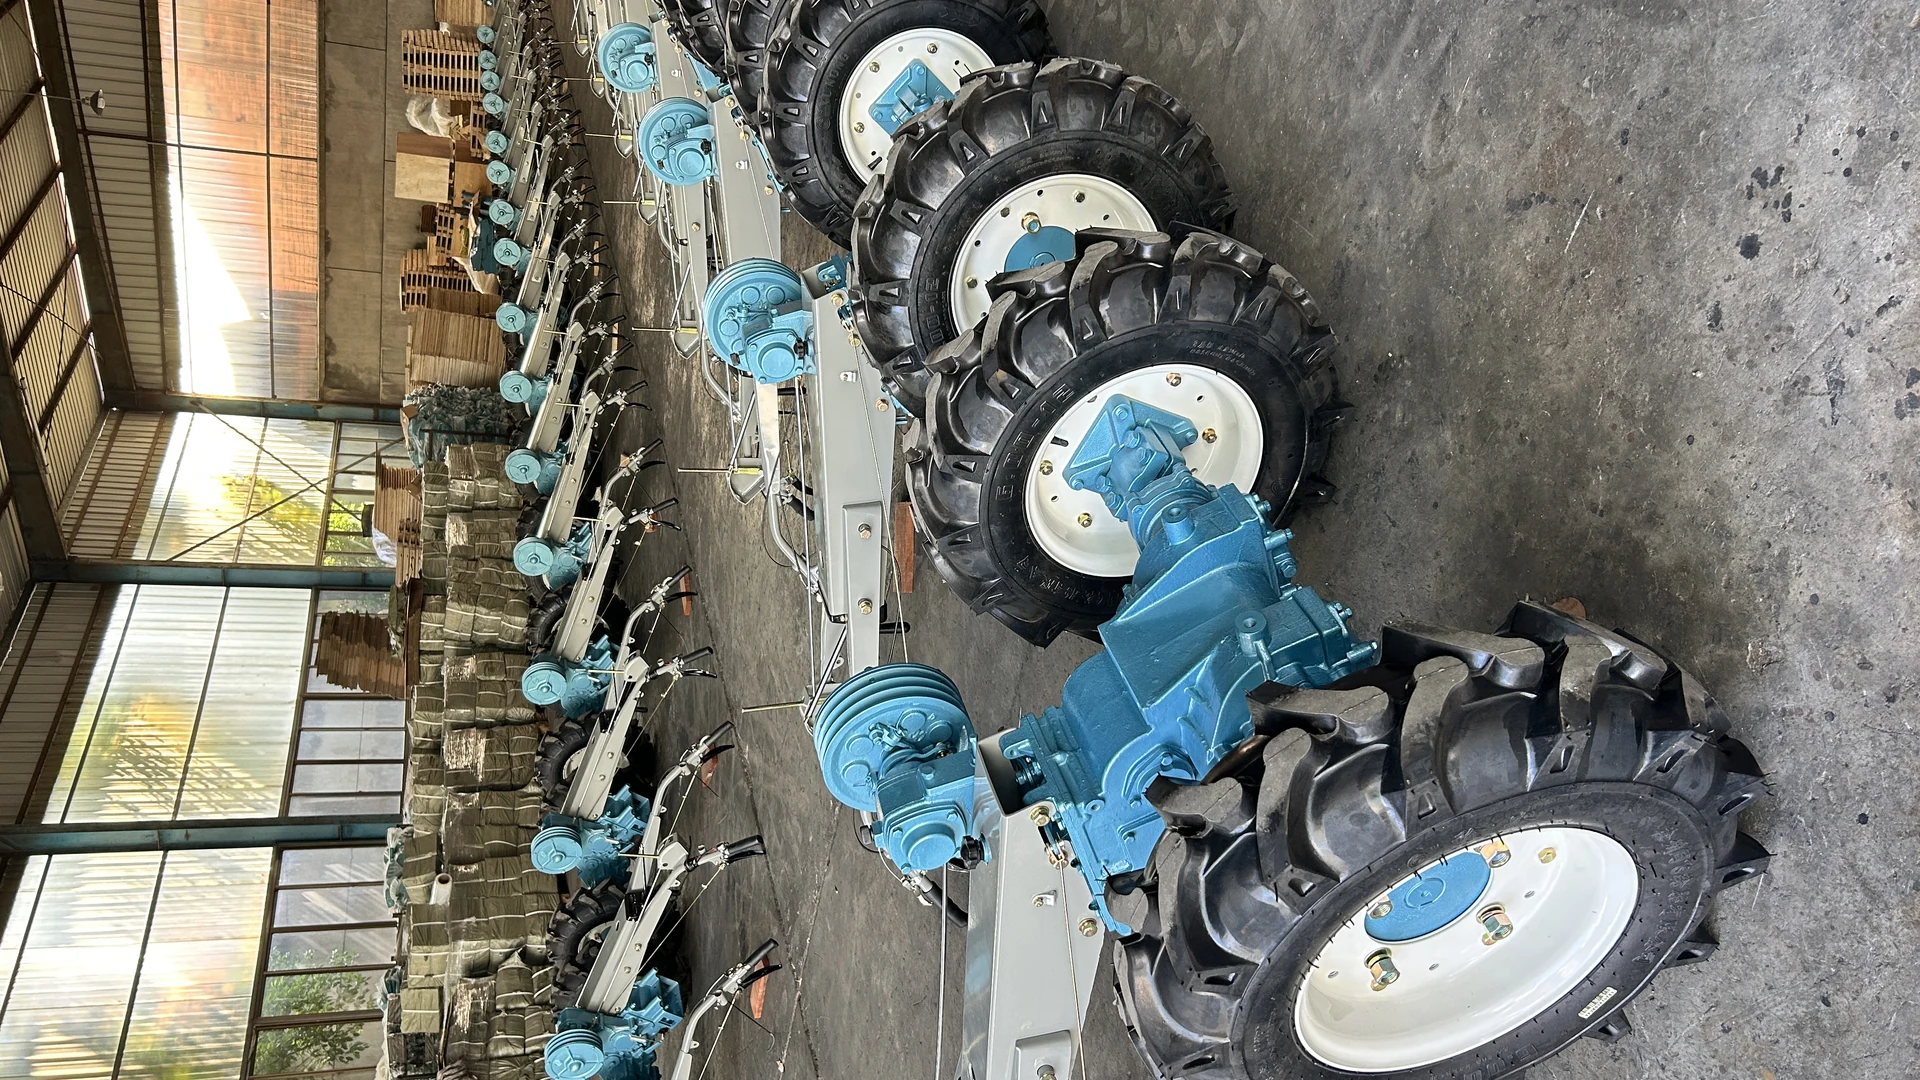
The order layer made physical: crated and wheeled units staged together, where the packing unit decides what the buyer unpacks at the other end.
Two omissions matter here. Commercial terms — price, minimum order quantity, lead time, warranty, certification — are not addressed in this article; they belong in a written quotation, so treat a package plan without them as complete on the technical side only. And no claim is made here about any other manufacturer's attachments: confirmation is a machine-by-machine exercise, and the honest answer from any supplier is a document, not a sentence. The wider version of the same discipline is in the power tiller procurement guide.
A five-step plan you can run with any supplier
- Write the work, field by field. For each market you serve: the work to be done, the soil, the month it is done in, and the strip or row layout. This document decides everything downstream and is the one part of the plan a supplier cannot do for you.
- Choose the platform class against that document. Weight, power class and working width follow from the work — not from the attachment list you liked first.
- Confirm the interfaces in writing. Mounting and drive, working width and depth against the crop layout, wheel set and tread, and power available at the chosen width.
- Split the order into equipment, wear parts and hardware. Then check the split against the quotation line by line, packing unit and documentation included.
- Re-verify before production. Take the confirmed configuration, walk it back through steps 1 and 2, and ask what changed since it was quoted. This is the step where a width, a blade count or a wheel set quietly becomes the wrong one.
The package is finished when the answers to all five steps are written down, not when the attachment list looks complete. That is also the definition a distributor can hand to a colleague.
Bottom line
A tiller with attachments is only as good as the order that describes it. Start from the work and the ground, fix the platform, confirm the four interface questions in writing, split equipment from wear parts and hardware, and state the packing unit — and the attachment list stops being a guess about what might fit and becomes a configuration a factory can build. If you are planning a package for a market and want the configuration checked line by line, send us the field and platform details and we will work through the interface questions with you.