
Power tiller blades are identified by the machine they fit, not by their name
A replacement power tiller blade is identified by four blocks of information, and only one of them is about the blade. The machine it belongs to, the rotor it bolts to, the blade's own form and dimensions, and the wear that put it on your list. A part number is the last thing added, not the first thing you look for.
That order is the whole argument of this guide. Sellers of replacement blades organise their catalogues by machine brand and model code, because a blade that fits one rotor is scrap on another. Ask for "a power tiller blade" and the question that comes back is what a parts desk asks all day: which machine, which width, how many blades, and what does the old one look like?
SUNTEC builds two power tiller platforms, the MUBOTA M80 and the GN12 / Super 12 chassis, both with rotary tillers at 480 mm and 600 mm working widths. Current part numbers and prices are issued by our sales team on a quotation, so nothing here invents one. For the wider parts picture on these machines, start from the spare parts and technical support hub, where the wear-parts and support material for this machine family is collected as it is published.
Step 1 — Identify the machine the blades belong to
Two machines from the same factory can share a working width and still take different blades. Start on the machine, not in a catalogue.
Look for the identification on the machine itself: the model marking on the frame or transmission housing, and the engine plate. Photograph both while the machine is complete — that photograph is the single most useful thing you can put at the top of a parts enquiry.
Platform | Engine class | Gearbox | Recorded weight, without engine |
|---|---|---|---|
MUBOTA M80 | 7–10 hp, options by quotation | Aluminium | 179 kg |
GN12 / Super 12 | 12.5 hp-class water-cooled diesel | Cast iron | 470 kg |
The M80's drivetrain is published as two V-belts from the engine to the main shaft, a gear drive to the wheel axle and a chain drive from the transmission to the blade axle; the GN12 / Super 12 chassis carries the cast-iron gearbox. The rotor and its drive are what a blade set is built around, and the same nominal blade bolted onto two different rotors is not the same part in service.
Then fix the terminology, because the same hardware carries several names — the two-wheel tractor alone has four of them — and the name is what most enquiries get wrong:
- Power tiller, walking tractor, two-wheel tractor, hand tractor — the same machine class in different markets and standards. Export catalogues use all four.
- Tines, blades, rotavator blades — the soil-engaging knives on the rotor. In the US, "tiller tines" and "rototiller" usually mean a garden machine of a different design, which is why that request comes back with consumer parts.
- Rotavator is the common trade name for the same rotor assembly in parts catalogues in several export markets.
Write the machine name as it appears on the frame, and say which market's term you are using. If you stock blades for a fleet, the power tiller range gives the platform split; the parts list for each model comes with the quotation. "Power tiller" is the term the FAO's global review of mechanisation uses for this class of machine, and that review records manufacturers from Asia establishing importation and distribution operations especially for power tillers, water pumps and post-harvest equipment.

The machine identifies the rotor, and the rotor identifies the blade.
Step 2 — Record the working width, because it sets the blade count
This is the step most power tiller blade enquiries skip. Working width is not a property of the blade; it belongs to the rotor the blades are bolted to, and it decides how many blade positions that rotor has.
Our own specification tables show it directly: on the MUBOTA M80 the standard 480 mm rotary setting is recorded with 14 blades and the optional 600 mm setting with up to 16, while the GN series table records the 600 mm rotary configuration at 18 or 24 blades. The GN12 / Super 12 chassis has a customer-confirmed public working-width range of 480 mm or 600 mm; the 18 and 24 figures are what the GN table records at 600 mm, listed here as table entries rather than as a general rule.
Platform | Working width | Blades recorded | Where the figure comes from |
|---|---|---|---|
MUBOTA M80 | 480 mm (standard setting) | 14 | M80 specification table |
MUBOTA M80 | 600 mm (optional setting) | up to 16 | M80 specification table |
GN12 / Super 12 | 600 mm | 18 or 24 | GN series specification table |
One width, two different rotors, two different blade counts: the count is a design decision taken with the rotor radius and the intended tilling duty. A study of rotary blade geometry and rotary speed from Nanjing Agricultural University — which notes that many different shapes of blade are produced by local manufacturers — tested conventional and C-type blades on a rotor of 225 mm radius carrying 18 blades across a 0.8 m tillage width. Radius, blade count and width are fixed together before a single blade is ordered. There is no universal blade count, and no universal blade.
So record two numbers, not one:
- The working width the machine is set up for — 480 mm or 600 mm here, and say which setting the blades came off.
- The blade positions on that rotor — count blades per flange, count the flanges, multiply. A rotor with nineteen occupied positions out of twenty is a twenty-position rotor with a missing blade, and saying so beats any part number.
If you are not sure how your machine's width was specified in its own documentation, the guide to reading power tiller specifications separates the figures that belong to the machine as built from those that belong to the configuration it is set to.

Blades exist as a set on a rotor. Counting them per flange turns "a tiller blade" into an order quantity.
Working width: 480 mm or 600 mm.Blades recorded across the two platforms: 14, 16, 18 or 24, depending on the rotor.The width and the count travel together — send them together, or the order is a guess.
Step 3 — Describe how the blade is held on the rotor
A rotor is a shaft with a row of flanges along it, and every power tiller blade on the machine bolts to one of those flanges. That explains most of what goes wrong in a blade order, because a photograph of one blade on a bench carries none of it: not which flange it came from, not which way round it was fitted, and not how many bolts held it.
Three things about the mounting decide whether a new blade seats and cuts:
- The flange layout — how many flanges sit along the blade axle and how many blades each one carries. Blades are arranged around the shaft in a repeating sequence so the load stays even as the rotor turns.
- The bolt pattern — how many bolts hold each blade, and their diameter. Mounting holes are the one feature of a power tiller blade that tolerates no error: a blade whose holes are a few millimetres out does not sit down on the flange, and the mismatch shows up as a loose blade rather than as a small deviation.
- The orientation of each blade — blades are handed, and one fitted the other way round trails its cutting edge instead of leading with it. On a machine whose blade axle is chain-driven, as the M80's is from the transmission, that direction is fixed, so the correct orientation of every blade follows from it.
On our walking tractors the blade set sits under the tiller guard, on the same assembly that carries the tiller gearbox — which is why this step exists: you cannot record the mounting without noting what has to come off first. The GN series walking tractors show how the rotary tiller, its guard and the blade assembly sit together.
One safety habit first: isolate the drive and let the rotor stop before you reach into the tiller. ISO 4254-5:2018, the safety standard for power-driven soil-working machines, specifies the type of information on safe working practices that manufacturers must provide with the machine — a good reason to keep the manual with the machine. Manufacturer instructions take priority over anything written here.

Blades are fitted under the guard on the tiller assembly. Record the flange layout and bolt pattern while the housing is off — that is the only moment those details are visible.
Step 4 — Read the blade itself: form, dimensions and holes
Now the part everyone starts with, and the easiest to get wrong: the power tiller blade in your hand is the worn version of the part you need, so measure it knowing which features have changed.
Form is the vocabulary your supplier will answer in. Rotary tillage blades are commonly described as C-type, L-type or curved blades, with slasher blades named separately; the naming describes the sweep of the blade as it leaves the shank and the shape of the cutting edge. That taxonomy is good for one purpose: agreeing with the supplier which family you are looking at. It does not identify the part — two blades of the same type from two different rotors can differ in every dimension that matters, which is exactly why a type name is not an identification.
Then measure. Six numbers, taken with the blade off the machine, clean, flat on a bench:
Measure | How to take it | What it decides |
|---|---|---|
Overall length | Shank end to tip, along the blade | Whether the tip clears the guard and reaches the intended depth |
Blade width | Across the flat of the blade, at the widest point | Soil load and whether the blade fits the flange spacing |
Thickness | At the shank, away from the edge | Whether the blade seats flush under the bolt head |
Mounting hole diameter | Across each bolt hole | Whether your bolts pass through at all |
Hole centre-to-centre distance | Hole centre to hole centre | Whether the blade lines up on the flange — the fit dimension |
Curvature or offset | How far the tip stands out from the mounting face | The working angle of the blade in the soil |
Two of those deserve a warning. Hole centre-to-centre distance, not hole-to-end distance: the tip wears away, the holes do not, so the distance between the holes is the one long dimension that stays identical. And thickness at the shank, not at the edge: the edge is what has worn; the shank is where the blade is still the blade you want to order.
Measure to the nearest millimetre with a steel rule, and use callipers for the holes and the thickness if you have them. A photograph beside a rule is a useful second record but not a substitute: a photograph does not resolve a millimetre, and the mounting holes are decided in millimetres.
If the tip is worn away altogether, say so rather than measuring what is left of the cutting end: measure the shank and the holes, photograph the blade flat, and state that the tip is gone.
Step 5 — Judge the wear before you order a replacement
Power tiller blades wear because soil is abrasive, and how fast they wear is a property of the ground. A review of wear in tillage tools published in Heliyon reports that the wear rate of tillage implements increases as the size of sand particles in the soil increases — which is why one district runs a blade set for years while a neighbouring one cannot. Paddy work is its own case: it puts the rotor into abrasive, sticky soil for long stretches, and paddy field cultivation is where blade condition belongs on the pre-season check rather than the after-failure list.
Four signs are worth acting on:
- Depth has fallen off on the same setting. The blades are the first suspect, not the last.
- The edge is rounded but the shape is intact. That is a sharpening case; a blade that has lost its tip is a replacement case.
- Wear is uneven across the rotor. Blades on the harder-working side wear faster, and the set stops being uniform.
- The machine is labouring. More passes for the same seedbed, a heavier engine note, more wrapping, or new vibration all point at the blade set.
Then decide the quantity honestly. Blades sit on the rotor as a set, and a set carrying a few new blades among blades worn to half thickness is no longer uniform.
Sharpening deserves a plain answer, because it is the question that arrives most often with a blade photograph. Sharpening restores an edge; it does not restore a form. If the blade still has its sweep and its width and only the edge has gone, a correctly sharpened blade returns to work. If the tip has gone or the sweep has been ground back, sharpening leaves a different shape on a rotor balanced around the original one.
Step 6 — Send the evidence: what a blade enquiry actually needs
Everything above collapses into one list. Send these nine items and the blade order stops being a conversation about names.
- The machine as marked. The model code from the frame or transmission housing, plus the engine's power class.
- The working width it is set to. 480 mm or 600 mm on these platforms, and whether the machine can be reconfigured.
- How many blade positions the rotor has. Total positions, counted per flange.
- How many are worn, how many broken, how many serviceable. Three numbers, not one word.
- The blade form and the handedness. The family name your market uses, and whether the blade came from the left or right side of the sequence.
- The six measurements. Length, width, thickness at the shank, hole diameter, hole centre-to-centre distance, curvature or offset.
- The bolt pattern. Bolts per blade, bolt diameter, and the number of flanges on the blade axle.
- The photographs. Five shots cover it: the machine plate or frame marking, the blade laid flat with a rule beside it, both faces of the blade, the flange with the blades still fitted, and the tiller side of the machine with the guard on.
- The field note. Soil type, whether the machine works mostly wet or dry, and roughly how many hours or seasons the set has run.
Two of the nine decide fit rather than appearance: the blade flat with a rule in frame, and the rotor photographed with its blades still fitted.
Keep the record per machine, not per order. One sheet carrying the platform, the width setting, the blade count, the hole centre distance and those two photographs is the same sheet next time you need it. Distributors stocking blades for a fleet already work this way: the procurement guide for power tiller enquiries separates the technical items from the commercial ones.

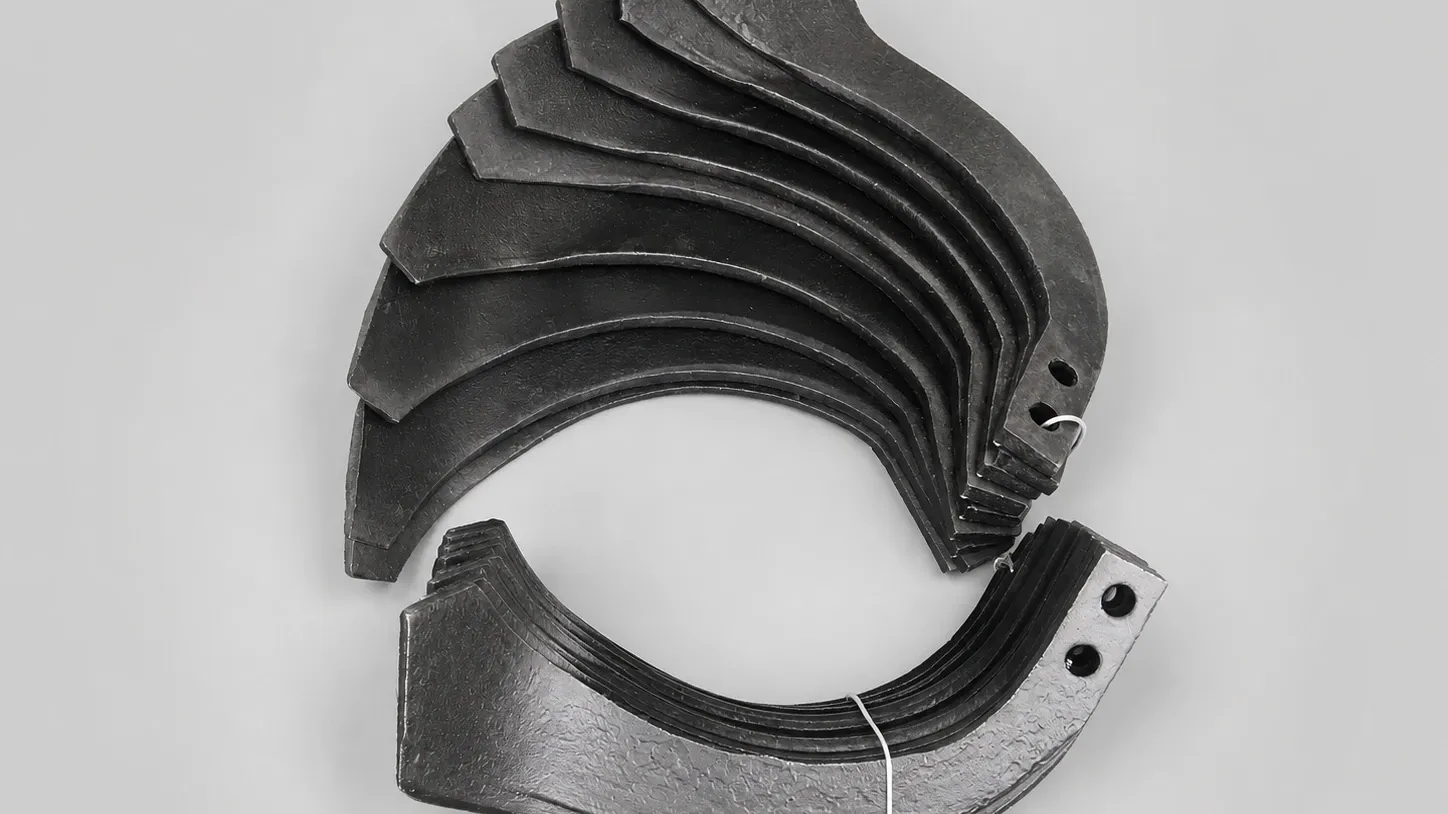
Parts and sub-assemblies travel packed as sets like this — which is why the machine sheet matters.
What happens at the other end is out of your hands: the blade for that rotor is confirmed, and price, quantity and delivery are issued with the quotation. Send the nine items and write to our team with the photographs attached — the answer you get back will be about your machine rather than about a blade in general.
Questions that arrive with the photographs
Are power tiller blades universal?
No, and the numbers above are the reason: one platform is recorded with 14 blades at one working width and up to 16 at another, and a different platform at the same 600 mm width with 18 or 24. Blade positions, mounting holes and blade form are decided by the rotor, and the rotor by the machine. "For a power tiller" describes a category, not a part.
Is a rotavator blade the same part as a power tiller blade?
Physically, yes: rotavator is the trade name for the rotary tiller and its blades in several export markets, and it means the same soil-engaging knives on the same kind of rotor. What differs is the catalogue. If your supplier's list is headed "rotavator blades" and your machine is called a walking tractor, say so in the first line.
Can I order blades without a part number?
Yes. A part number is one way to write a blade order, and the most reliable one when both sides work from the same catalogue. When there is no number to hand, the nine items in Step 6 describe the blade by the rotor it fits, which is what the number encodes in the first place. Send them, and the number can be confirmed back to you.
Should I replace only the worn blades, or the whole set?
Report the distribution and let the supplier answer for your machine. Count how many positions are worn, broken and serviceable, and photograph the rotor with the blades fitted. A few new blades inside a heavily worn set leave the rotor carrying two blade geometries, which is a maintenance decision rather than a parts decision.
Send the machine, the width, the count, the measurements and the photographs, and the blade you need stops being a description and becomes an order. Every other item on that machine that wears is the same conversation — the same nine items are what a supplier needs before they can name the part.