
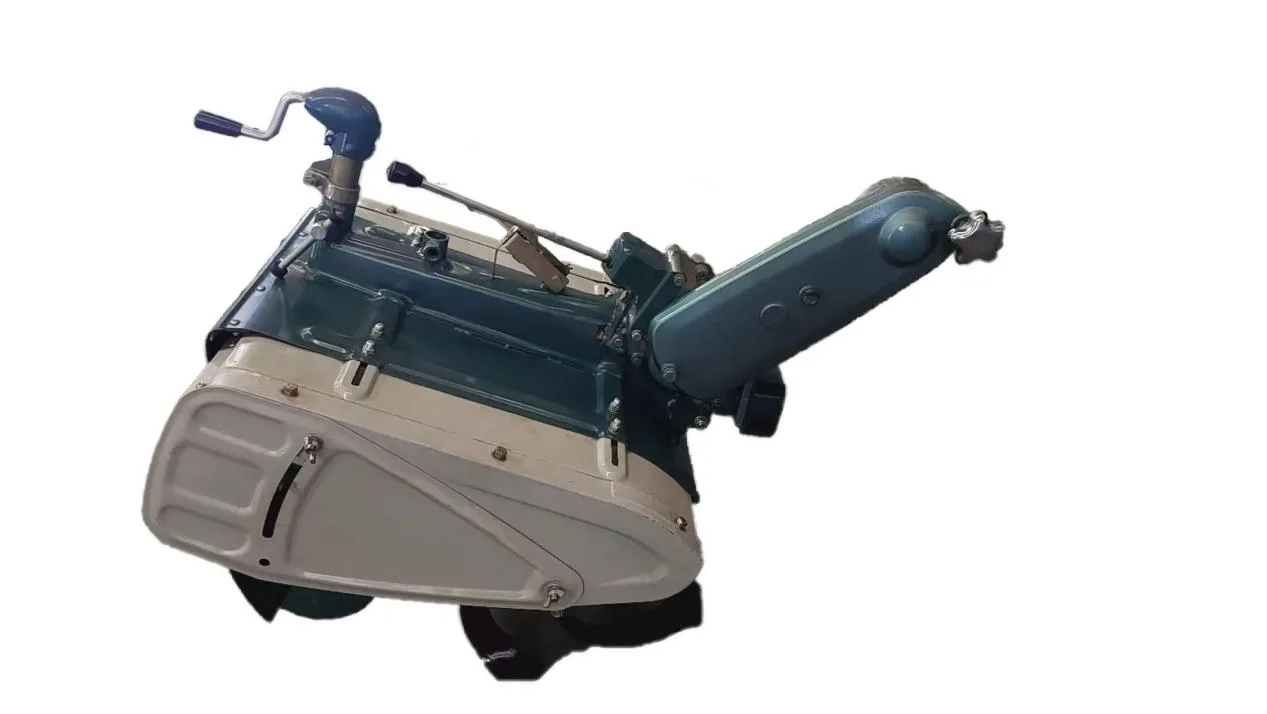
Rotary tiller vs plough is not a contest between two grades of the same job. A plough cuts a slice of soil, lifts it and turns it over, so the surface layer ends up underneath and the furrow sits open behind the share. A rotary tiller does the opposite thing to the profile: it hits the soil repeatedly with powered blades and mixes it in place, chopping residue into the tilth instead of burying it. One pass of a plough inverts; several passes of a rotary tiller homogenise. Everything else in this comparison — depth, residue, seedbed finish, working window, where each implement belongs in a sequence — follows from that single physical difference.
So the useful question is not which one is better. It is which result the field in front of you actually needs, and that is decided by soil type, moisture, what is growing on the surface and what the next crop requires. If you came here looking for tiller vs plow, that is this comparison in the US spelling — throughout this article plough is the British spelling of the implement US buyers call a plow: same machine, same parts, one page.
At a glance, before the mechanics:
Plough (single pass) | Rotary tiller (one to two passes) | |
|---|---|---|
Action on the profile | Cuts, lifts and inverts a slice | Impacts and mixes in place — no inversion |
Residue and weed seed | Buried under the furrow slice | Chopped through the worked layer |
Surface after the pass | Rough, open furrows — a first step | Level, pulverised, closer to a finished tilth |
Reach for it when | Heavy residue, pasture renewal, deeper primary tillage | Fast preparation on small or irregular parcels |
What a plough actually does to the soil
A mouldboard plough is one of the primary tillage implements, and its job is to invert a slice. The share cuts the furrow bottom loose, the mouldboard lifts that slice and rolls it over, and the landside holds the plough against the furrow wall so the cut stays straight. The result is a field that looks unfinished: a series of open furrows, with the previous crop's residue, weed seeds and any surface organic matter turned under rather than left on top.
That inversion is what a plough is bought for. Burying residue is the fastest way to clear a surface before a fine seedbed is prepared, and it puts a layer of relatively clean soil at the top of the profile where a drill or a planter will meet it. Because the tool is not powered — it is dragged — depth is set mechanically by the operator, and a plough can work deeper than a walk-behind machine's driven rotor can reach. The trade's working rule on depth is a ratio: roughly half the furrow width, so a narrow furrow is worked shallow and a wide one can go deeper. That relationship between width and depth is the reason plough bodies are described by width rather than by horsepower.
The costs are equally mechanical. A plough leaves the surface rough and open, so it rarely finishes a seedbed on its own — it is the first step, not the last. Turning residue under also moves weed seed into the soil rather than removing it, which matters on a field with heavy weed pressure. And inversion disrupts the layers a soil has built up: the FAO's tillage reference material treats ploughing as a primary-tillage operation whose effect on structure and on the distribution of organic matter is a deliberate trade-off, not a side effect to be ignored.
What a rotary tiller actually does to the soil
A rotary tiller is a powered implement. A horizontal rotor carries blades — often called tines in catalogue language — and the machine's driveline spins that rotor while the machine is drawn forward, so the soil is struck many times per metre of travel. There is no inversion step. The blades lift, throw and re-cut the same soil, and after a pass or two the result is a mixed, pulverised layer with the residue distributed through it.
Two consequences matter to a buyer. The first is depth. A walk-behind rotary tiller's working depth is bounded by the housing and the rotor, not by the operator's choice of setting, so it is a shallower tool than a drag plough in the same field. The second is that a rotary tiller can finish the job a plough starts: because it keeps cutting until the tilth is fine, a single implement can take ground from stubble to seedbed without a second tool. That is why rotary tilling is so often described as a one-pass land preparation answer, and why it is popular on the small and irregular parcels where a two-wheel tractor is the machine on hand.
Repeated passes are the normal mode of rotary tilling rather than a failure of technique, and that is exactly where the implement's reputation gets complicated. The Australian Wine Research Institute's field notes on disc ploughs and rotary tillers separate implements on the powered-versus-draft axis rather than on a tiller-versus-plough one: a powered disc plough or rotary tiller is more aggressive and runs at a faster operating speed than a draft tool, and the notes' caution is that repeated cultivation of this kind damages soil structure. That is the mechanism behind the reputation — efficient at clearing, and less well suited to holding a structured profile over years. Working the same soil to the same shallow depth season after season is where a traffic-pan-like layer can begin to build. A plough is not exempt from creating a pan either: the classic plough pan forms at the depth the share repeatedly passes, because the tool presses the furrow bottom as well as cutting it. The honest position is that both implements can create a compacted layer, at different depths, for the same reason — repetition.

Rotary tiller vs plough: the result each leaves, side by side
Set the two mechanisms against each other and the differences stop being a matter of opinion. The table below compares the field result each implement produces, under stated conditions: a single pass of a mouldboard plough, and one to two passes of a walk-behind rotary tiller, on comparable soil.
Result dimension | Plough (single pass) | Rotary tiller (one to two passes) |
|---|---|---|
Action on the profile | Cuts, lifts and inverts a slice | Impacts and mixes in place — no inversion |
Typical working depth | Deeper; set by the operator, in relation to furrow width | Shallower; bounded by rotor and housing |
Residue and stubble | Buries it below the furrow slice | Chops and distributes it through the tilth |
Weed seed | Moves seed into the soil, out of reach of birds and the surface | Leaves much of the seed in the worked layer |
Surface left behind | Open furrows, rough, unfinished | Level, pulverised, closer to a finished tilth |
Passes to a seedbed | Usually more than one — plough, then a secondary tool | Often one, and occasionally two |
Soil moisture window | Needs drier, firmer soil to cut and roll cleanly | Can work a wider band, but smears when too wet |
Compaction risk | A pan can form at repeated share depth | A shallower pan can form under repeated passes |
Rooting depth affected | A shallow restriction is lifted away and turned under with the slice | A shallow restriction is broken up and mixed through the worked layer |
Best fit | Heavy residue, pasture renewal, deeper primary tillage | Fast land preparation, small and irregular parcels |
The two rows most often argued about are moisture and pan depth, and both are worth a plain statement. Wet clay is the enemy of both implements, but it fails each one differently: a plough working wet soil smears the furrow wall and can leave a polished, poorly draining channel, while a rotary tiller working wet soil pummels the same soil into a structureless paste. Conversely, very dry and very hard ground resists a drag plough's cut, while a powered rotor will still bite into it — which is why a rotary tiller is often the implement that gets a late field started. On compaction, University of Minnesota Extension's soil compaction guidance is the useful framing: the layer is created by repeated load at a consistent depth, so the implement that travels at one depth most often is the one whose pan you should watch, whichever type it is.
Where each implement sits in the tillage sequence
Most of the confusion in this comparison disappears once the two implements are placed in the sequence rather than side by side as rivals.
Ploughing is primary tillage. It opens the profile, and it is normally followed by a secondary tool that breaks the clods the plough rolled over and levels the surface. The plough's own output is unfinished by design.
Rotary tilling can be primary or secondary. Used on stubble or pasture it is doing primary work — loosening and mixing what was there. Used on ground that has already been ploughed, or on a seedbed being brought to a finish, it is doing secondary work. The same implement occupies two different positions, which is precisely why arguing about "plowing vs tilling" as if they were parallel operations goes wrong.
That dual role produces the sequence most two-wheel tractor operators actually run: plough once to invert and bury, then rotary till to break down the furrow slices into a tilth. It also produces the shortcut — rotary till only — which is legitimate on the parcels where the residue load is light and the depth requirement is shallow. The FAO's manual on integrated soil management and conservation practices sets out the primary-to-secondary framework and the conservation alternatives, including the reduced and no-till systems that skip primary tillage altogether. Those systems are worth knowing about even on a tillage-selling page: a distributor who can explain when not to till is the one a customer comes back to.
Plough types: mouldboard, disc and chisel
"A plough" is not one implement, and three different tools get called by that name.
Plough type | What it does to the slice | Residue | Ground it suits |
|---|---|---|---|
Mouldboard | Cuts, lifts and inverts a slice | Buried under the furrow slice | Clean, stone-free ground; pasture renewal; deeper primary tillage |
Disc | Rolls a concave disc through the slice, turning it | Buried, or partly mixed | Stony, rough or heavily trashy ground |
Chisel / subsoiler | Shatters in place — no slice, no inversion | Left on the surface | Removing a compaction layer without turning the profile over |
Mouldboard plough. The inversion tool described above: share, mouldboard, landside, beam. It rolls a slice over and buries what was on the surface. Body widths run from small single-furrow units sized for walk-behind machines up to multi-furrow versions for tractors, and the FAO's mechanization review treats the mouldboard plough as the reference primary-tillage implement against which reduced-tillage systems are measured. A reversible version carries bodies on both sides of the beam so each pass can turn the furrow the other way, which keeps the field level on sloping or strip-worked ground — a variation worth knowing about, though not every platform in this machine class runs one.
Disc plough. Instead of a mouldboard, a heavy concave disc cuts and turns the slice. It rolls over obstacles and heavy residue more readily than a mouldboard and is the commoner choice where stony ground would damage a fixed body. A disc plough is not a disc harrow — the harrow is a secondary tool that sizes clods rather than turning a slice — and the distinction is worth holding onto, because the two are persistently confused in catalogue copy.
The practical split between the two comes down to ground and residue: mouldboard plough vs disc plough is really clean soil and a deep, tidy slice versus rough, stony or trashy ground that would stall a fixed body.
Chisel plough. Shanks rather than bodies: no slice, no inversion, just a set of tines that shatter and loosen the profile while leaving residue on the surface. A subsoiler is the extreme version of the same idea, going deeper to break a pan without turning anything over. If a field has a compaction layer and you want to remove it without inverting the profile, this is the family to look at — and no rotary tiller substitutes for it.
One component worth a mention because buyers ask: a coulter is the circular knife mounted ahead of a plough body that cuts the surface trash and the top of the furrow slice so the mouldboard can roll it cleanly. On clean ground its value is limited; on heavy residue it is the difference between a plough that turns a slice and one that drags a tangle.
Rotary tiller types and what the trade calls them
The vocabulary on the rotary side is messier, and an importer meets all of it on bills of lading and spec sheets.
Rotary tiller, rotary cultivator, rotavator, rototiller. These describe the same working principle — a powered rotor of curved blades — with the name changing by market. If the question is what is a rotavator, it is this implement: rotavator is the Commonwealth and export-catalogue term that a US importer is likely to see on an inbound document. Rototiller is US consumer slang for a garden-class machine, and it is a recognition cue rather than a specification: it tells you nothing about the machine class behind it. If a customer says rototiller and means a walk-behind unit with a rotor, you are both talking about a rotary tiller.
Power tiller vs rotary tiller. These are not two implements. A power tiller is the machine; a rotary tiller is the implement that machine commonly carries. The two names collide because in some markets the combined unit — two-wheel tractor with rotor fitted — is simply sold as a power tiller. A two wheel tractor plough is the same platform wearing the other implement.
Walk-behind versus tractor-mounted. This is the axis that matters for a distributor. A walk-behind machine drives its implement from the machine's own driveline and steers from a handlebar; a tractor-mounted implement expects a three-point hitch and a PTO shaft. Words like PTO rotary tiller describe the second class and its retail channel, not the platforms covered here. A power harrow is a third thing again — vertical tines that stir the soil rather than a horizontal rotor that cuts it — and it is not interchangeable with a rotary tiller.
Two related terms turn up in search and are worth a clarifying line each, because the sources are inconsistent about them. Rotary plow is used loosely: at least one reference work that ranks for this query treats it as another name for a rotary tiller, so treat the phrase as a naming variant to be pinned down with the supplier rather than as a separate implement type — and it is certainly not a synonym for a plough. And within the tiller family, machine-versus-machine comparisons belong on their own pages rather than here — the difference between a two-wheel tractor's rotary tiller and a rear-tine tiller is a machine-selection question, while this page is about implement results, and the numbers that settle it live on the power tiller specification sheet.
Matching the implement to the machine you sell
This is the part no consumer-facing page covers, and it is what decides whether an implement set is orderable.
Every implement has to meet the machine at a drive end and a mounting end. On the driveline side the question is what turns the blades and how: a belt from the engine to a main shaft, a gear train from that shaft to the wheel axle, and then either a chain or a gearbox out to the blade axle. On the M80 chassis the engine drives the main shaft through two V-belts, the main shaft drives the wheel axle through gears, and the transmission drives the blade axle through a chain — a layout that makes the blade drive a separate, serviceable link in the chain of power. The GN12 chassis uses an iron gearbox instead of the M80's aluminum unit, which is the kind of difference that changes what a machine is bought for rather than how it looks.

The rotor, its gearbox and its blades form an assembly that bolts to the machine rather than being built into the chassis — which is why the implement set is specified separately from the machine on the order, and why the same chassis can be quoted with a rotary tiller or with a plough rather than being bought for one job.
The second interface is the mounting and covering point: a hitch frame at the machine's rear, a guard over the rotor, and the geometry that keeps the rotor in the ground at a workable depth. This is where "compatible" stops being a word on a quotation and starts being a set of measurements.

Then there is the rotor itself. Blade count and tilling width travel together, and both are configuration choices rather than a single fixed specification. On the M80 chassis the standard rotary configuration is 480 mm with 14 blades, with 600 mm and up to 16 blades as the wider option. On the GN12 chassis SUNTEC's specification sheet records the 600 mm configuration with an 18- or 24-blade rotor, while the published range for that platform is 480 or 600 mm — so a downloaded sheet shows the 600 mm column. The wheel set is the third variable and interacts with both: a wider rotor and a narrow tread are not a combination to promise without checking, and traction wheels change the machine's behaviour in the same soil.
What a distributor needs to hold together for a customer is therefore a short, checkable list: machine class and power, rotor width and blade count, driveline type, the mounting and guarding hardware, tyre or cage-wheel choice, and the wear parts that will be re-ordered. The power tiller and walking tractor implements hub is the index for the rest of that set.
For the platforms themselves, the M80 power tiller page carries the chassis-level facts, and the implement has to fit whichever platform is on the order. The two classes are also specified at different power bands: the M80 chassis takes engines in a 7–10 hp range, while the GN12 walking tractor class is specified around the 12.5 hp mark. Power is not an implement question, but it is the question that comes before one — it decides how wide a rotor the machine will pull at a workable speed rather than at a crawl.
That is also where the comparison resolves commercially. The same chassis that carries a rotary tiller also carries a plough attachment — a single-furrow unit on the M80 class and a double-furrow unit on the GN12 class, which is also the class specified with the anti-skid wheel sets. So the answer to "should I stock the tiller or the plough" is both, because the platform takes either and the field condition decides which one a given customer walks out with. Implement matching is quoted, not assumed.
Two further points are worth raising rather than dodging. Guarding is fitted equipment: a rotor housing and drive cover belong to the assembly, and an implement set quoted without them is incomplete rather than cheap. And wear parts — blade sets above all — are a repeating order, so the blade pattern, not just the blade count, is part of what an importer is standardising on. That is the practical test of the platform idea: the implement set is specified separately from the machine, and what a chassis can carry counts for as much as what it can pull.
Choosing by field condition and crop
Decide from the field outward, not from the implement inward. In order:
- Soil type. Sand and light loam respond well to a rotary tiller and finish quickly. Heavy clay is where the plough's clean slice and the tiller's tendency to smear are both most visible, and it is the soil most likely to need primary tillage followed by a secondary pass.
- Moisture at working time. Both implements have a window. A plough wants soil firm enough to roll a slice without smearing; a rotary tiller wants it dry enough not to pummel into a paste. On a two-wheel platform worked by one operator, a tool that tolerates a wider window is worth more than one that is theoretically faster.
- What is on the surface. Heavy stubble, a cover crop or old pasture favours a plough, because burying that material is the fastest route to a clean seedbed. Light residue favours a rotary tiller, which chops and incorporates it in one pass.
- Paddy or dry land. In puddled paddy work the objective is a saturated, mixed layer rather than an inverted profile, which is rotary tiller territory; paddy-field cultivation and dry-land cultivation split on exactly this point.
- Slope, stones and erosion exposure. On sloping ground, inversion and the furrow it leaves can channel water; a disc plough rolls over stones that would damage a fixed body. Where erosion is already a concern the conservation question is not which implement but how few passes.
- Crop and rooting depth. A crop that needs a deeper, less restricted root zone argues for a plough or a chisel-type tool — that is the row-crop case, where a corn or cotton crop is going into ground that has been loaded at one depth for years, or the orchard and deep-rooted vegetable case, where a young planting has to reach down through the profile rather than sideways. A shallow-rooted or quickly planted crop is served by a rotary pass alone.
- Acreage and operator skill. More ground and a skilled operator justify the extra pass that a plough-then-till sequence costs. Small and irregular parcels usually favour the single-implement route.
- Weed pressure. Burying seed removes it from the surface; mixing keeps it in the worked layer. On a weedy field that single row can outweigh every other consideration.
For a distributor, this list is also the sales script. It is the reason an implement set is quoted per customer rather than sold as a fixed package, and it maps directly onto how field conditions drive tillage choices on the machine side of the same decision.
Questions distributors get asked about both implements
Can a rotary tiller dig as deep as a plough? No. A plough's depth is set by the operator and can go deeper than a walk-behind rotor, whose working depth is bounded by the housing and rotor geometry. If depth is the requirement, the answer is a plough or a chisel-type tool, not more passes with a tiller.
Does rotary tilling damage soil? Repeated passes at the same shallow depth can build a compacted layer and break down structure, especially on clay and when the soil is worked wet. A plough is not automatically gentler — repeated ploughing at one depth forms a pan too, and inversion disturbs the profile. Modern practice therefore leans on fewer passes and on leaving residue in place.
What are the disadvantages of a rotary tiller? Shallower working depth, a narrower moisture window than its popularity suggests, and a real risk of pulverising wet clay. It also concentrates wear in the blades, which is a recurring cost rather than a one-off.
Is plowing better than tilling? They are not competing versions of one operation. Ploughing is inverted primary tillage; tilling is a powered, mixing operation that can be primary or secondary. The right answer depends on residue, depth and what comes next, not on a ranking.
Which one should I stock? Both, because the two implements answer opposite field conditions and the same platform carries either. The mix a reseller carries is a question about the fields in its territory, not about the implements — and the implement set that gets ordered is the one a distributor's own procurement questions have already narrowed down.
One pass or two? A rotary tiller can reach a seedbed in one pass on light, low-residue ground. On heavy residue or where depth matters, expect a plough pass first and a till finish afterwards.
Implements that sit next to these two
Two neighbours come up constantly, and keeping them separate is most of the terminological work in this category.
A disc harrow is a secondary tillage tool. It carries gangs of discs that cut and size clods after primary tillage; it does not turn a slice and it is not a substitute for a rotary tiller, because it leaves the surface coarser on purpose. The comparison that actually gets asked — disc harrow vs tiller — is about finish and speed rather than about inversion, and it deserves its own page rather than a paragraph here.
A cultivator is the broader, older word for an implement that loosens and weeds soil, and cultivator vs plow turns on the same distinction as everything above: one stirs what is there, the other turns it over. A power harrow completes the set of secondary tools — vertical tines stirring rather than a horizontal rotor cutting.
If the question is which of these to carry alongside a rotary tiller and a plough, the answer follows the sequence rather than the catalogue: primary inversion, then clod sizing and levelling, then a finished tilth. That is the whole selection logic of this implement set, and it is why the hub is organised around implements and attachments rather than around machines.
So, in one line each: on heavy, wet or weedy ground the plough earns the first pass, because inverting is the fastest route to a clean surface; on light, low-residue ground worked by one operator against a planting date, the rotary tiller earns the only pass. Most ground sits between the two, which is why the useful answer a reseller gives is a sequence rather than a single implement — and why the platform in the yard should be able to carry either.