
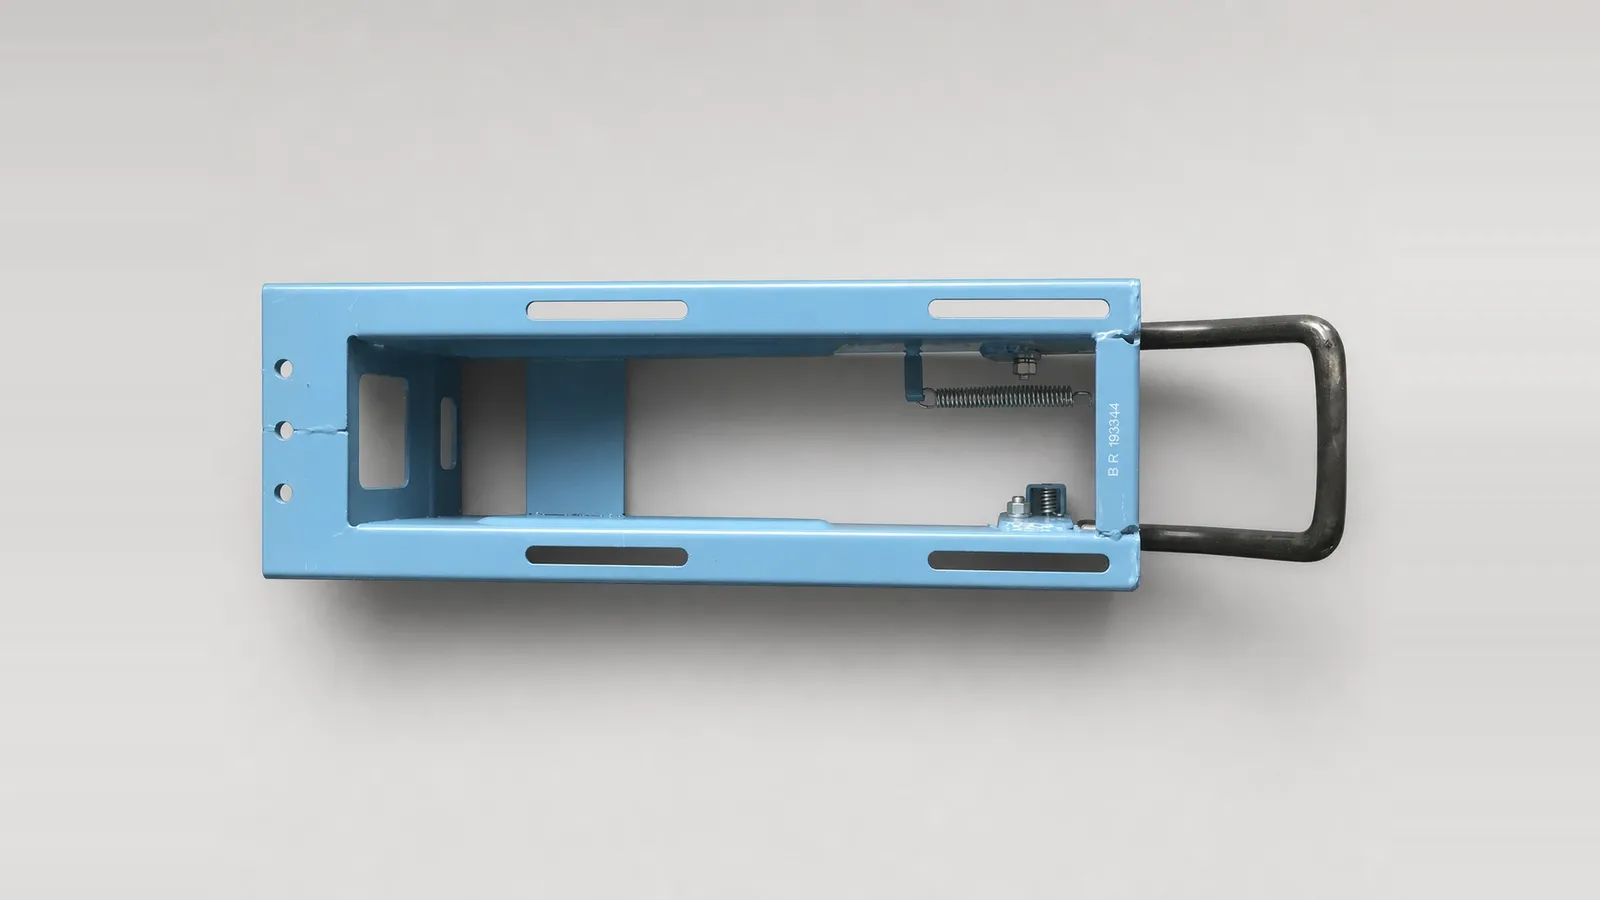
A tractor towing hitch order rarely fails on the machine. It fails at the joint between the machine and the trailer: the coupling bracket that arrives does not line up with the hitch frame behind the gearbox, the pin is a millimetre or two off the eye, or nobody wrote down what the coupling is rated for, so the first serious load becomes the test.
For a distributor that is the most expensive kind of delay. A walking tractor trailer is already paid for, already shipped, and now sits in a yard waiting for a part that costs less than the freight did.
This guide is about that hardware: what a power tiller trailer hitch package contains, where the hitch sits on each platform, what the numbers on a coupling mean, the braking and lighting items that most quotations leave out, and the checks to run when the container is opened. It deliberately does not argue whether transport work is worth doing — the slope, surface and distance questions that decide whether a trailer earns its place are covered in how far a power tiller and trailer make sense for short-distance farm transport. Here, the trailer is already in the plan and the question is how to specify it.
What a towing package actually contains
A purchase order usually carries one line: trailer, one unit. That line hides seven separately specified items, and a supplier can only be held to what the order names. Splitting the package is what makes a quotation comparable between suppliers.
Item | Where it sits | What has to be specified |
|---|---|---|
Hitch frame or mounting plate | Bolted to the rear frame of the machine | Bolt pattern, plate section, position relative to the axle |
Coupling element | Machine-side hitch, or the clevis at the trailer drawbar tip | Type, pin or eye diameter, rated value |
Drawbar | Forward from the trailer A-frame to the coupling | Length, section, height at level ground |
Axle and wheels | Under the trailer bed | Single or double axle, track, tyre size, load per wheel |
Brakes | Trailer axle, with linkage or hydraulics to the machine | Type, actuation, parking brake |
Lights and reflectors | Rear of the trailer, plus the machine if road use is intended | Voltage, plug type, mounting |
Packing and spares | Crate or container | What ships assembled, spares kit, documents |
Quoting by package also solves a problem distributors meet later: a trailer for power tiller use is one item inside a larger implement order, and the same hitch frame carries the plough, the rotary tiller and the transport equipment. Treating the trailer as a separate purchase is how a buyer ends up with two generations of bracket hardware on one shipment — the point made in how a working attachment package is assembled.
The machine side: where the hitch sits on each platform
Two-wheel tractors — the power tiller platforms sold under both names — do not have a three-point linkage. The hitch is a fabricated frame bolted to the rear of the transmission housing, sitting low between the wheels, and everything the machine pulls goes through it. That single fact explains most of the fit problems in this category: the coupling point is close to the ground, it is narrow, and its position relative to the axle is fixed by the frame rather than adjustable by the operator.
The two SUNTEC platforms differ in the numbers a trailer has to match. The MUBOTA M80 chassis is listed at 179 kg without engine, 2050 × 710 × 1235 mm, with a wheel track adjustable between 390 and 780 mm on 5–12 tyres, six forward and two reverse gears, and an internal expanding brake. The GN12 / Super 12 chassis is a heavier machine: 470 kg without engine, 2950 × 980 × 1240 mm, 210 mm minimum ground clearance, and a wheel track that can be set at 810, 750, 690, 630 or 570 mm, also with six forward and two reverse gears.

Ground clearance is the figure that surprises buyers. At 210 mm, a drawbar that runs level on a concrete apron will scrape on a plough furrow, a bund or a rutted track, and the load that pushes the machine's tail down makes it worse. The platform pages carry the rest of the machine context — GN12 walking tractor sets out the heavier platform in the same terms — but the hitch hardware itself is where the specification has to be explicit.
SUNTEC's published product copy describes the hitch frame as the order-critical interface between the walking tractor and the selected plough, rotary or transport equipment, and lists a small-trailer connection as a documented configuration item rather than a standard inclusion. That distinction matters for a distributor: it tells you to ask for the trailer, its connecting hardware and the supply scope as a named part of the quotation, not to assume a trailer appears in the crate.
The trailer side: drawbar, coupling bracket and axle

Look at a farm trailer the way an engineer does and there are three things to specify, in this order.
The drawbar carries both pull and push. Pull is obvious; push is what happens the first time the operator reverses to position the trailer, and a light or long drawbar buckles or slews sideways under that load. Its length also sets the turning circle, and its height at level ground decides whether the trailer rides nose-up, nose-down or level behind the machine.
The coupling at the tip is the part that has to match the machine. On the trailer above it is a clevis: two upright lugs with a pin hole between them, which is common on light agricultural trailers and is exactly why a buyer cannot assume a ball coupling. A ball-and-socket coupling, a clevis and a drawbar eye are three different systems, and no amount of drilling turns one into another safely. The trailer photographed here is a reference unit; whether a trailer is supplied, and in what specification, is confirmed in the quotation.
The axle position sets how much of the load rests on the machine. That is why a two wheel tractor trailer is normally built with the axle close to the middle of the bed: most of the weight then sits on the trailer's own wheels, which is what the machine needs, because its hitch frame was designed to pull rather than to carry a vertical load. Move the load behind the axle and the drawbar lifts; move it forward and the machine's rear end is pushed into the ground.
Two more points belong here rather than in the quotation. Trailer track narrower than the machine's track behaves badly on side slopes and on bunds, and trailer tyres are usually small and hard, so they transmit every rut straight to the drawbar. Both are reasons to keep the first loads light and the route chosen — not reasons to fit larger wheels without checking the bed height.
What the number on the coupling actually means
Here is where the retail pages and the engineering documents part company. Retail listings sell a trailer coupling by shape and by a tonnage in the title. The engineering documents describe one by its class and by a set of calculated values.
UN Regulation No. 55, which sets the approval requirements for mechanical coupling components of vehicle combinations, classifies couplings rather than describing them: class A is a 50 mm coupling ball on the towing vehicle, class B is the coupling head on a trailer drawbar that fits it, class C is a clevis-type drawbar coupling with a 50 mm pin and a jaw, and class D is a drawbar eye with a parallel hole for that pin. The regulation requires the manufacturer to declare the applicable D, Dc, S, V and U values, and provides for approval markings on the component. Interchangeability, in other words, comes from the class and the declared values, not from two parts looking as though they belong together.
Scope matters here. R55 governs coupling components on vehicles approved for road use, so a trailer built for field work may carry no class marking at all — that is not unusual in this category, and it is not a defect in itself. What it means for a buyer is simpler: without a marking there is no declared rating, and the part has to be treated as unrated until the supplier states otherwise in writing.
That is the vocabulary to use with a supplier. "One ton trailer" is not a specification, because the same phrase is used for three different things:
The figure | What it actually measures | The question to ask |
|---|---|---|
Payload | Load the trailer is designed to carry, excluding its own weight | Payload at what gross weight, and on what surface? |
Gross weight | Trailer plus load, the figure that matters for towing and braking | Is the gross weight declared on a plate, or estimated? |
Bed capacity | What fits inside the box in volume or in bags | Volume in cubic metres, and bed dimensions |
Asking for a photograph of the plate and the marking, plus a written answer to whichever of the three figures the order relies on, is a two-minute request that settles most of this before an order is placed.
Brakes and lights: the two lines most quotations leave out
A two-wheel tractor can pull considerably more than it can stop, because the machine's braking effort is shared between two wheels that are also carrying the drive. That is why the trailer's brakes are not an accessory.
Most two-wheel tractors, including both SUNTEC platforms, have no hydraulic or air circuit to feed a trailer, so the trailer has to brake on its own terms. Three arrangements are common: an inertia or overrun coupling that applies the trailer brakes when the trailer pushes back against the machine as it slows, a mechanical linkage from the machine's brake pedal, or a hydraulic system with its own actuation. Which one is fitted changes both the price and the maintenance routine, and a distributor quoting a trailer without knowing which of the three it uses is quoting an unfinished package.
The Health and Safety Executive's guidance on using tractors safely is blunt about the consequences: trailers without an adequate braking system have led to loss of control, jackknifing and tractor overturn, and inadequate trailer brakes let the machine be pushed sideways on slopes or slippery ground. The same guidance tells buyers to purchase trailers with a braking system that suits the tractor and to ask the supplier for brake efficiency information, and it describes failsafe trailer braking as the provision that applies the trailer's brakes if the tractor stalls or the two become unintentionally detached. Those two requests — brake efficiency figures and a failsafe arrangement — belong in the quotation, in the same place as the axle and tyre specification.
Lighting is the other line that disappears between the enquiry and the crate. The HSE's information sheet on farm trailers, cited in the next section, requires tail-lighting systems including direction indicators, in full working order on both the towing and the trailed vehicle — which for a walking tractor means a supply arrangement for the machine side as well, not just a lamp bar on the trailer.
Whether any of this is allowed on a public road is a separate question, and one no supplier can answer for every market. In the European Union, agricultural and forestry vehicles and their trailers are type-approved under Regulation (EU) 167/2013, a framework that covers vehicle safety including braking; outside it, national rules on lighting, marking, speed and registration apply and differ by country. The practical instruction to a distributor is simple: establish whether the trailer will ever leave the farm before choosing the specification, because a road-legal requirement changes the brakes, the lights and the paperwork. Engine power is not the limiting factor in any of this.
Five measurements to exchange before the order is confirmed
Most coupling mismatches are settled by five numbers. They cost a caliper and ten minutes, and they convert a vague enquiry into an order a factory can build against.
Measurement | How to take it | What goes wrong if it is wrong |
|---|---|---|
Hitch pin or drawbar eye diameter | Measure across the hole in the eye or the bore of the lugs, not across the pin | Pin rattles and wears oval, or will not pass at all |
Bracket width and hole spacing | Centre-to-centre between mounting holes, plus plate thickness | Bolt holes do not line up; forcing them ovalises the plate |
Drawbar height at level ground | Ground to the centre of the coupling, empty and loaded | Trailer rides nose-up or nose-down; weight shifts onto the machine |
Machine wheel track at the chosen setting | Centre-to-centre of the rear wheels, at the setting ordered | Trailer track mismatched; poor behaviour on slopes and bunds |
Rear clearance and obstructions | Ground to the lowest point of the hitch frame and drawbar line | Drawbar strikes furrows, bunds and ramps |
The HSE information sheet makes the compatibility point in one sentence: the tractor's hitch should be compatible with the trailer's drawbar connection — hook and eye, or clevis to drawbar — and all necessary securing pins should be in place. Compatibility is a property of the pair, not of either part, which is why the five measurements travel with the enquiry. The same discipline applies to every other attachment on the machine, and it is set out step by step in how to confirm implement compatibility before ordering.
What to check when the container is opened
The arrival check is the distributor's last chance to catch a mismatch before it becomes a customer complaint. Eight items, in the order they are worth doing:
- Coupling marking. Find the marking on the coupling and compare it with the paperwork. No marking means no declared rating.
- Pin and retainer. The hitch pin should pass by hand, and the retaining clip should be present with a spare in the spares bag.
- Welds. Look at the drawbar-to-frame junction for undercut, porosity, or paint sprayed over a crack. A weld painted over immediately after welding hides its own defects.
- Hole alignment. Bracket holes should align without a hammer. If they need reaming on arrival, the plate was drilled to a different pattern.
- Tyres and wheel nuts. Check the size against the order, look for sidewall cracking from container heat, and confirm wheel nuts are torqued rather than merely fitted.
- Brake linkage. The linkage should move freely by hand before any load is applied, and the parking brake should hold the empty trailer on a slope.
- Lights. Test every function, and check that the plug matches what the machine can supply.
- Crate against packing list. Fasteners, clips and brackets are the items that go missing, and they are the items that stop the trailer working.
The HSE's guidance on using machines safely puts the same point in operator terms: before work starts, check that the machine is safely attached to the towing vehicle and pay attention to the condition of the drawbar or pick-up hitch, the hitch rings, pins and clips. That is a pre-use check on a working machine; at delivery it should be done once, properly, with the paperwork open. SUNTEC publishes a pre-delivery inspection checklist that follows the same order for a complete machine, and the trailer items slot into it.
Where the trailer sits in the implement order
The trailer is not a separate product category. It shares a mounting interface with the plough and the rotary tiller, and it shares a container with them. Ordering it in a different round from the implements is how a distributor ends up with two shipments, two sets of fasteners and brackets that were drilled at different times.
Three practical consequences follow. Specify the whole set against one machine configuration, including the wheel track setting, because changing the track after the implements are built is not a paperwork exercise. Ship the set together, and let the packing documents record which parts travel assembled and which travel loose. And hold one inspection at arrival for the whole set, not one per shipment.
For the selection logic behind the rest of the set — which implements a platform can carry, and how the packages combine — the cluster guide on power tiller and walking tractor implements is the place to start. For a trailer specifically, the four things to send with an enquiry are the machine model and track setting, the load the customer actually moves and over what surface, whether the trailer will ever leave the farm, and any local requirement for brakes or lights. Those four answers are what turn a towing hitch from a line item into a package that works on the first load, and they can be sent through the quotation request form.
Compiled by the SUNTEC editorial team from published product documentation and the sources cited above, and reviewed against SUNTEC's configuration documentation on 28 October 2026. It does not replace the supplier's written confirmation, the operator's manual, or the road-use rules that apply in the destination market.